
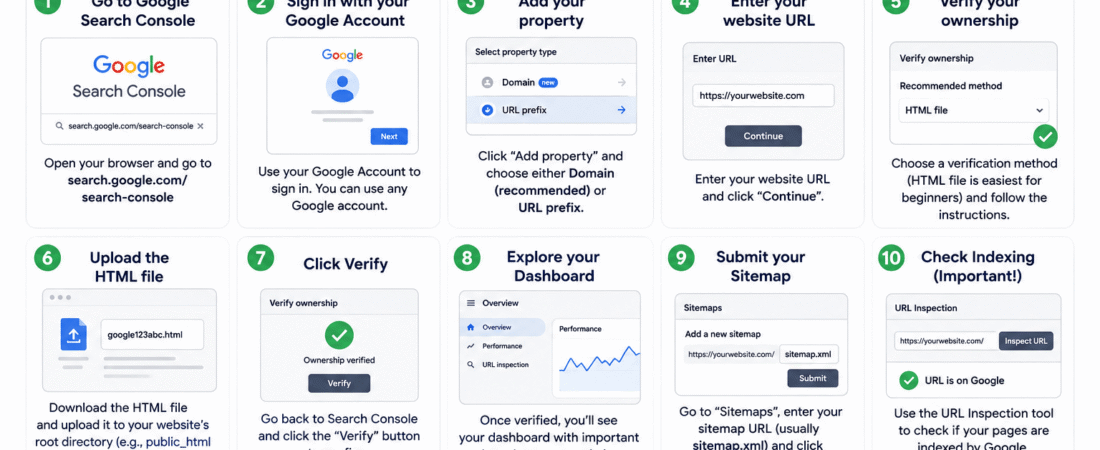
Here’s the full setup process, step by step. Google Search Console (GSC) is free and it’s one of the most valuable tools you can add to your SEO toolkit — it shows you exactly how Google sees your site.
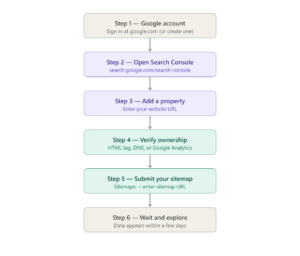
Step 1 — Sign in with a Google account
Go to search.google.com/search-console and sign in with any Google (Gmail) account. Use the account you want to be the “owner” of your site’s data — typically your main work or personal Gmail.
Step 2 — Add a property (your website)
Once signed in, click “Add property.” You’ll be asked to choose between two property types:
- Domain — covers your entire domain including all subdomains and both
http/https. This is the recommended option if you can verify via DNS. - URL prefix — covers only a specific URL (e.g.
https://yoursite.com). Easier to verify, slightly less comprehensive.
For most beginners, URL prefix is the simpler starting point.
Step 3 — Verify ownership
Google needs to confirm you actually own the site. There are several methods — pick whichever suits you:
| Method | Best for |
|---|---|
| HTML tag | Paste a <meta> tag into your site’s <head> section |
| HTML file | Upload a small file to your server |
| Google Analytics | Works instantly if you already have GA installed |
| Google Tag Manager | Same — works if GTM is already live |
| DNS record | Add a TXT record via your domain registrar (GoDaddy, Namecheap, etc.) |
If you use WordPress, the easiest path is the HTML tag method — paste it into your theme’s header.php or use a plugin like Yoast SEO which has a built-in GSC verification field.
Step 4 — Submit your sitemap
A sitemap is a file that lists all the pages on your site, making it easier for Google to find and crawl them. After verifying, go to the “Sitemaps” section in the left sidebar and enter your sitemap URL.
Most sitemaps live at yoursite.com/sitemap.xml — that’s worth checking in your browser first. WordPress sites using Yoast, Rank Math, or similar plugins generate one automatically.
Step 5 — Wait (this is normal)
It usually takes 2–7 days before meaningful data starts appearing. Don’t worry if the dashboard looks empty at first.
What to actually look at once it’s set up
Once your data comes in, these are the four most useful reports for beginners:
Performance — the most important report. Shows which search queries brought people to your site, how many clicks and impressions each got, your average position, and your click-through rate (CTR). This tells you what’s already working and where to focus.
Coverage (Index) — shows which of your pages Google has indexed and flags any errors preventing pages from being indexed. If a page isn’t here, it won’t appear in search results.
Page Experience — shows Core Web Vitals scores (how fast and stable your pages feel). Google uses these as ranking signals.
Links — shows which pages on your site have the most internal links pointing to them, and which external sites are linking to you.
Pro tips for beginners
Start by filtering the Performance report to show your top 20 queries by impressions. Look for any where you rank in positions 8–20 — those are “low-hanging fruit” where a bit of on-page improvement could push you onto the first page. Also check for pages with high impressions but very low CTR — that usually means your title tag or meta description needs work.